

Buy ProductsDistributors     |
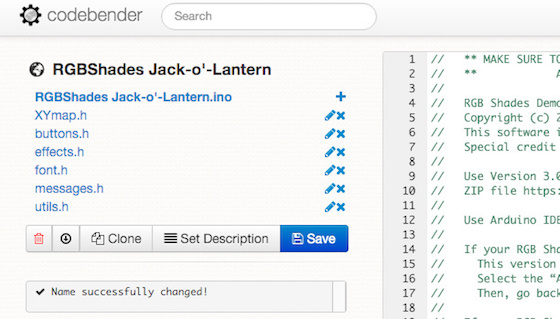
RGB Shades Jack-o'-LanternHere's a quick demo of how to create a new pattern for the RGB Shades. We'll add some jack-o'-lantern triangle eyes, and make them flicker orange just like the real thing (well, sort of). First off, here's the final result. It's pretty hard to capture the effect on camera, especially since orange colors seem to max out the sensor so that it always appears bright. But watch the reflection in the table and you'll get the idea: We're using codebender to edit and upload a custom sketch to the RGB Shades. Once you get the browser plugin installed, it's a really easy way to get started without a lot of downloading and setup. Plus, all the required libraries are pre-installed and kept up-to-date. In this case, we're using the excellent FastLED library, which controls the WS2812/APA104/Neopixel style LEDs easily and has many helper functions for managing pixels. (A Codebender sketch used to be located here. Sorry, that service was shut down!) Clicking that should display a sketch editing window much like the one below (if you're logged in on codebender): You can clone the project to your own account by pressing the Clone button. Then, change the name to make the project more descriptive by clicking the name of the project and editing the text there. Now we're ready to start writing code! Under the name of the project, there is a list of files in the project. Click on the "effects.h" file and scroll to the bottom. The effects.h file is where we keep the code used for actually drawing the pixel effects. The rest of the files are mostly used for helper functions and data storage. Create a simple starter function: // Draw jack-o'-lantern eyes with flickering orange pattern
void pumpkin() {
// startup tasks
if (effectInit == false) {
effectInit = true;
effectDelay = 10;
}
}
The "startup tasks" section should be included at the beginning of every effect pattern. It is run once after switching from a different pattern, and can be used to set up variables like "effectDelay" which sets (in milliseconds) how frequently this pattern should be activated. We still have some code to write, so let's add the actual shape of the jack-o'-lantern's eye. We're using a few bytes to create a binary bitmap of the shape we want. The RGB Shades are 16 pixels wide, so a 5-byte-tall bitmap can cover half the array. We'll mirror this later in order to fill the whole array. // Draw jack-o'-lantern eyes with flickering orange pattern
const byte pumpkinBitmap[5] = {
0b00010000,
0b00111000,
0b01111100,
0b11111110,
0b01111100 };
void pumpkin() {
// startup tasks
if (effectInit == false) {
effectInit = true;
effectDelay = 10;
}
}
This code still doesn't do anything, so let's try writing something to the LEDs and give it a try. We will add flickering later, but before getting too deep it's a good idea to test each stage. // Draw jack-o'-lantern eyes with flickering orange pattern
const byte pumpkinBitmap[5] = {
0b00010000,
0b00111000,
0b01111100,
0b11111110,
0b01111100 };
void pumpkin() {
// startup tasks
if (effectInit == false) {
effectInit = true;
effectDelay = 10;
}
CRGB currentColor;
for (byte y = 0; y < 5; y++) {
for (byte x = 0; x < 8; x++) {
if (bitRead(pumpkinBitmap[y],7-x) == 1) {
currentColor = CRGB::Orange;
} else {
currentColor = CRGB::Black;
}
leds[XY(x,y)] = currentColor;
leds[XY(15-x,y)] = currentColor;
}
}
}
The code above steps through each of the 5 rows of LEDs. On each row, it steps through 8 LEDs, and checks the corresponding bit in pumpkinBitmap. If it's 1, then it'll set the color to orange. Otherwise, it'll set the color to black. The pixels are written to the LED array using a mapping function, once for the first half of the array and again for the mirrored half of the display (mirrored simply by subtracting the current LED x-coordinate from the maximum x-coordinate). Right now this code won't appear on the RGB Shades! We have to add it to the effect list. On the main .ino file for the project, we need to find the effectList array and add "pumpkin" to it: // list of functions that will be displayed
functionList effectList[] = {pumpkin,
threeSine,
threeDee,
scrollTextZero,
plasma,
confetti,
rider,
scrollTextOne,
glitter,
slantBars,
scrollTextTwo,
colorFill,
sideRain };
Let's upload this to the RGB Shades and see how it looks! Hmm...glad we tested that. First, the color isn't right, it's too yellow. We'll need to adjust the color with a bit less green, which should make it appear redder. Second, the row of pixels on the bottom seemed like a good idea, but they look too much like an arrow rather than a rounded triangle. It'll be better to make a flat-bottomed triangle instead. Edit the code and try again: // Draw jack-o'-lantern eyes with flickering orange pattern
const byte pumpkinBitmap[5] = {
0b00010000,
0b00111000,
0b01111100,
0b11111110,
0b00000000 };
void pumpkin() {
// startup tasks
if (effectInit == false) {
effectInit = true;
effectDelay = 10;
}
CRGB currentColor;
for (byte y = 0; y < 5; y++) {
for (byte x = 0; x < 8; x++) {
if (bitRead(pumpkinBitmap[y],7-x) == 1) {
currentColor = 0xFF6000;
} else {
currentColor = CRGB::Black;
}
leds[XY(x,y)] = currentColor;
leds[XY(15-x,y)] = currentColor;
}
}
}
Much better! Finally, to add a flickering behavior to the eyes. Here is the final working code for the jack-o'-lantern effect: // Draw jack-o'-lantern eyes with flickering orange pattern
const byte pumpkinBitmap[5] = {
0b00010000,
0b00111000,
0b01111100,
0b11111110,
0b00000000 };
void pumpkin() {
// startup tasks
if (effectInit == false) {
effectInit = true;
effectDelay = 10;
}
CRGB currentColor;
CRGB flickerOrange;
static int flickerBrightness = 200;
int flickerIncrement = random(25) - 12;
flickerBrightness += flickerIncrement;
if (flickerBrightness < 50) flickerBrightness = 50;
if (flickerBrightness > 255) flickerBrightness = 255;
flickerOrange = 0xFF6000;
flickerOrange.nscale8_video(flickerBrightness);
for (byte y = 0; y < 5; y++) {
for (byte x = 0; x < 8; x++) {
if (bitRead(pumpkinBitmap[y],7-x) == 1) {
currentColor = flickerOrange;
} else {
currentColor = CRGB::Black;
}
leds[XY(x,y)] = currentColor;
leds[XY(15-x,y)] = currentColor;
}
}
}
It's a little more complicated, but not by much. We've added an intermediate value to store a brightness-adjusted color we call flickerOrange. This color is scaled by the flickerBrightness value. We've set some upper and lower bounds on flickerBrightness, and on every run through we grab a pseudorandom value, subtract half the expected range of random values, and add the resulting number to flickerBrightness. Since flickerIncrement can be positive or negative (or zero) it will randomly move the brightness up and down in varying size steps. The result is pretty similar to a wind-blown candle dimming and brightening but never going completely out. One last thing...we left all the other effects in effectList, and autoCycle is enabled. You can simply hold down the mode-select button to stop auto cycling. But if we want to start up in pumpkin mode and not change unless we tell it to do so, we have to turn off auto cycling. In the "utils.h" file, there is a line "boolean autoCycle = true;" which when changed to "boolean autoCycle = false;" will start the RGB Shades in manual mode. That's all there is to it! If you're familiar with programming, you should be able to make new patterns pretty easily within the existing code structure for the RGB Shades. If you still need to learn, we hope this guide helped you get started.
Submitted by Garrett on Mon, 10/26/2015 - 23:56. |
Cool Links 
|


Recent Comments
5 years 2 weeks ago
5 years 2 weeks ago
5 years 4 weeks ago
5 years 11 weeks ago
5 years 18 weeks ago
5 years 19 weeks ago
5 years 23 weeks ago
5 years 23 weeks ago
5 years 26 weeks ago
5 years 32 weeks ago